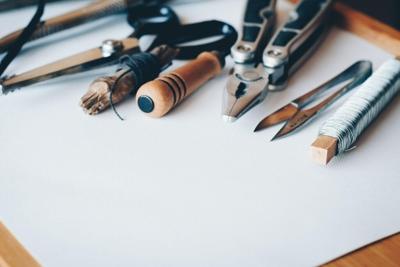
Installing a plumbing system can seem daunting, but with the right tools and guidance, it can be manageable. Whether you’re tackling this project to improve water quality or to meet specific inspection requirements, following a clear, step-by-step approach is crucial. For professional assistance, consider hiring an expert like https://www.cleanlineplumbing.com/
You may need to install a new plumbing system if you experience water quality issues or if you need to pass a Title V inspection. Here are ten easy steps to install a plumbing system yourself.
Step # 1: Start Drilling Through Sills:
Drilling is the first step in residential plumbing. Start drilling through the sill plates and below the floor to make room for the water pipes. Make sure your holes are at the same distance so that the water lines run parallel to the floor.
Step # 2: Work With The Water Lines:
Once you drill through the sill plates and floor, start running your water lines through them. After you pull the pipes, secure them using clamps. Try to keep the distance between hot and cold lines to minimize heat transfer among them. Also, leave a little space in the line to allow contraction and expansion of the pipelines.
Step # 3: Make Rough Stub Out For Sinks:
After you work with the lines, it is now time to do the rough stubbing. Place Copper fittings for rough stub outs in the sink. The end of this fitting is called rough fitting that allows you to see if there is any leakage. After you place the walls, cut off the cap and install finishing valves.
Step # 4: Put on the Crimps:
Crimping is the most important part of the plumbing. It joins your pipe to the rough stubbing and keeps it secure. Make sure your wire is straight when placing a crimp. Slide your crimp ring through the pipe and secure it on the top with the help of a plier.
Step # 5: Rough-in The Water Lines:
Roughing In means to pass all the water lines through holes and other framings. Once you secure the water lines with the crimps, you will have in all the pipelines. This step ensures that the water lines are properly aligned and secured within the framework of your home. If you notice any issues during this step, such as leaks or misalignment, it might require a water line repair before proceeding to ensure the integrity of the plumbing system.
Step # 6: Connect All The Water Lines:
Step # 6 involves connecting all the water lines. This is a complex step and needs prior planning. Take a picture of the pipelines and make a map. Use that map to connect the waterlines. Install the bottom bracket at the end of the manifold. This will allow supporting the whole framework.
Step # 7: Drill Holes For The Manifold:
According to the studs on the sill plates, mark and drill the holes on the manifold. Continue working till all the holes are drilled. Be extra cautious to make sure you don’t damage the manifold.
Step # 8: Install The Ball Valves:
The last step of the plumbing system is to install the ball valves in the framework. Mount the manifold and attach these ball valves into place. The function of these valves is to ensure that the fixture has its separate valve control.
Step # 9: Your Plumbing System Is Ready To Work!
Your residential plumbing system is now ready to work. Test all the fittings and valves to make sure there is no leakage. If you face any problem, contact your nearest plumber.


(0) comments
We welcome your comments
Log In
Post a comment as Guest
Keep it Clean. Please avoid obscene, vulgar, lewd, racist or sexually-oriented language.
PLEASE TURN OFF YOUR CAPS LOCK.
Don't Threaten. Threats of harming another person will not be tolerated.
Be Truthful. Don't knowingly lie about anyone or anything.
Be Nice. No racism, sexism or any sort of -ism that is degrading to another person.
Be Proactive. Use the 'Report' link on each comment to let us know of abusive posts.
Share with Us. We'd love to hear eyewitness accounts, the history behind an article.