
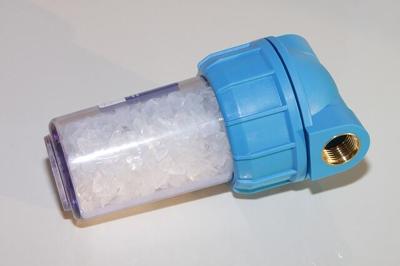

Today, having a water softener at home is a must if you want to maintain a good plumbing system, have long-lasting washing machines, and improve your health. However, when your resin bed gets damaged due to a significant amount of chlorine and iron, this will reduce your water quality. When this happens, it is time to replace resin in your water softener.
A high-quality resin bed can last from 10 to 15 years, only if you have an excellent water softener. Then how can you determine if your water softener needs resin replacement?
Your first warning sign is when you start noticing, soft water runs out quickly or even more alarming when there is no more soft water production at all.
Then, you might be asking how to replace resin in a water softener. Don’t worry. Below we will give you a complete give on how to replace resin in a water softener. But, before hurrying to change your resin bed, you should discard any other possible problems with your tank.
Replacing water softener resin: Things to consider first
Check there is not something else obstructing the water flow, such as a disproportionate amount of resin. You can find out the correct ratio of resin in three simple steps:
1. Find out the diameter of your resin tank by measuring the circumference and dividing it by 3.14.
2. Measure the height of your tank.
3. According to your tank size, look up the correct amount of resin.
If your resin amount is the right one, you can then move on and diagnose if your resin bed is indeed damaged and needs replacement.
Diagnosing resin bed issues
Now that you have discarded any other problems, it is time to check out the salt rate your system is using.
If your water softener uses a low amount of salt or none at all, there is probably an issue with the valve head. However, if it uses a regular salt volume, but there is no soft water, there are two possibilities.
1. Iron deposits impregnated in your resin. In this case, you can use some select chemicals to help you clean it.
2. If this step does not improve your water quality, then your water softener needs resin replacement.
How to replace resin in a water softener
The advantage of replacing water softener resin by yourself is you will save around $150 on service fees, and it will just take a couple of hours of your day. First, you need to purchase all the materials you will need to replace resin in a water softener.
Materials needed:
● Screwdriver
● Funnel
● New resin: to buy the right amount of resin that you need, check out the section above where we explain how you can determine it. Once you have this quantity, search online for the best resin. Do not try to save costs for this one.
● New rinser tube
● Gravel, in case your system needs it.
When you have all the materials, you could ask a friend to lend you a hand in replacing the water softener resin.
Alternatively, get in touch with an experienced local contractor. Click here to check out the top water softener service in Phoenix, Arizona.
Step-by-step guide to water softener resin replacement
1. Turn off the main water valve
The only thing you need to do here is to place the valve in a bypass position, or in other words, turn it from on to off. Check out this article if you have difficulty finding the main valve.
2. Turn the dial on
This will help you get rid of any internal pressure inside your tank, to make water softener resin replacement easier.
3. Unplug power
This is an essential step because you don’t want to have any type of hazard while you are manipulating the valve or removing the unit.
4. Detach plumbing
While you are replacing the water softener resin, there is no need for the plumbing to be connected to your unit. In this step, it is better to ask a friend to hold the tank for you. Then you need to turn the head to your left until it is unscrewed.
5. Get rid of the resin
All ten resin inside your tank is damaged, but you won’t want to throw it all over the floor since, at the moment, resin starts drying up, it will become slippery. Instead, you want to look for a bucket or even a trash can. If you have a friend who can help you carry the tank in this step, it will be much easier. Pick up the tank and let the old resin rinse out.
6. Take out the rinser tube
Once you take out the used rinser tube, this will allow you to get rid of some resin, which could be stuck at the bottom. With the rinser tube out, pick up the tank once again and make sure all the resin is gone. This is an essential step since you will be replacing the water-softener resin.
7. New rinser tube
After making sure all the old resin is gone, you need to cut a new rinser tube with the same height as the one before. Then insert it in your tank and tape the opening.
8. Refill your tank
In this step, you will need the funnel, gravel, and the new resin. First, accommodate the funnel on the head. Then take the gravel and sill it until it covers the screen. Finally, you are going to take the new resin and pour it into your tank.
9. Put back the head
This time, you will take the head and turn it to the right until it is screwed back onto the tube. Make sure you place the head in the center of the tube, then connect the plumbing.
10. Turn it back on
You will change the bypass position into the on position and check the system is in regeneration. Finally, you will test if it is producing soft water once again.
You are now ready to do a water softener resin replacement by yourself without paying costly service fees!


(0) comments
We welcome your comments
Log In
Post a comment as Guest
Keep it Clean. Please avoid obscene, vulgar, lewd, racist or sexually-oriented language.
PLEASE TURN OFF YOUR CAPS LOCK.
Don't Threaten. Threats of harming another person will not be tolerated.
Be Truthful. Don't knowingly lie about anyone or anything.
Be Nice. No racism, sexism or any sort of -ism that is degrading to another person.
Be Proactive. Use the 'Report' link on each comment to let us know of abusive posts.
Share with Us. We'd love to hear eyewitness accounts, the history behind an article.