

Making custom chocolate molds can turn any kids' party into a creative and fun event. Kids love seeing chocolates in different shapes, and creating these treats can be just as exciting as eating them. Parents and party planners can easily make homemade molds with simple tools or by exploring ready-made designs.
There are many ways to explore chocolate mold options at create custom molds for unique themes and shapes. Creating custom designs can add a personalized touch to the event and make sweets that are memorable for everyone.
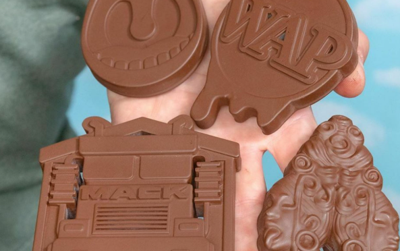
Use EasyMold Silicone Putty to create quick and safe custom molds in about 30 minutes.
EasyMold Silicone Putty helps make custom chocolate molds quickly. Kids can enjoy treats shaped like animals, cars, or any small toy they like. The process is straightforward and does not take much time.
Start by mixing equal parts of the putty until the color is even. Shape the putty around the item you want to copy, making sure it covers all the details. Wait about 25 minutes for the putty to set.
After it firms up, gently remove the item. The new mold is now ready for melted chocolate. Because the putty is food safe, it works well for parties and family events.
Clean-up is easy, too. Simply wash the mold with soap and water before using it again. This putty makes it simple to add fun and personal touches to any celebration.
Make molds from common kitchen ingredients like brown sugar and flour for edible chocolate casts.
Kids’ parties can be more fun with homemade chocolate shapes. Making custom molds from kitchen staples is simple. Brown sugar and flour work well for this project.
To start, fill a baking tray with brown sugar or flour and press it down to make it flat. Next, press an object, like a small toy, into the sugar or flour to create an impression. This shaped space will act as the mold for the chocolate.
Melted chocolate can then be poured into the shaped area. Allow the chocolate to cool and harden before removing it. The texture of brown sugar may add a slightly rough look to the chocolate, while flour gives a smoother finish.
This method is quick, easy to clean, and lets kids get involved. It’s a creative way to make unique treats using items found in most kitchens.
Use dinosaur cookie cutters with silicone putty for fun and easy shapes.
Making chocolate molds at home can be simple and fun. Kids enjoy creative shapes, and dinosaur designs are very popular for parties.
One method to make custom molds is using dinosaur cookie cutters and silicone putty. The cookie cutters give a clear outline, while the putty forms the base for the mold.
First, press the cookie cutter into the fresh silicone putty. Press down evenly, making sure the putty fills every edge and corner. Wait for the putty to harden.
Once the putty sets, carefully remove the cookie cutter. The putty will now have the shape of a dinosaur, ready for chocolate. Melt chocolate, pour it into the mold, let it cool, and pop out the treats for a quick party snack.
This approach helps make each party unique and fun for kids who love dinosaurs.
Create molds by pressing toy figures into food-safe silicone for detailed replicas.
One easy method for making custom chocolate molds is by using toy figures. By pressing the figure into soft, food-safe silicone, a person can make a mold that picks up small details from the toy.
The toy should be clean and dry before use. The silicone needs to be soft and flexible, which allows it to capture the shape and lines of the figure.
Once the silicone sets, it forms a flexible mold. This mold can then be filled with melted chocolate and placed in the fridge to harden.
This method is good for kids’ parties because it works with a range of simple toys and gives fun shapes that are familiar to children. The process does not take long and does not need special tools.
3D print simple shapes to mill molds cheaply and quickly for party themes.
3D printing makes it easy to design and create chocolate molds for kids’ parties. Basic shapes like stars, hearts, or animals are quick to model using simple computer software.
Once the designs are ready, they can be 3D printed with plastic. These prints act as forms for milling or vacuum forming the actual chocolate molds.
This method lowers the cost and saves time. It also lets parents or party planners shape molds to match any party theme, such as cartoon characters or party favors. The process is fast, which is helpful when planning events on short notice.
Using 3D printing in this way makes it possible to create fun shapes that will grab the attention of kids at a party.
Making custom chocolate molds for kids’ parties is simple and fun. Most people can use basic kitchen tools and supplies to create shapes that children will love.
Using household items like silicone trays, plastic containers, or even shaped candies can help shape the chocolate. This lets everyone make treats that match any party theme.
Short prep time, easy cleanup, and creative freedom make homemade molds a great choice for gatherings with kids.
(0) comments
We welcome your comments
Log In
Post a comment as Guest
Keep it Clean. Please avoid obscene, vulgar, lewd, racist or sexually-oriented language.
PLEASE TURN OFF YOUR CAPS LOCK.
Don't Threaten. Threats of harming another person will not be tolerated.
Be Truthful. Don't knowingly lie about anyone or anything.
Be Nice. No racism, sexism or any sort of -ism that is degrading to another person.
Be Proactive. Use the 'Report' link on each comment to let us know of abusive posts.
Share with Us. We'd love to hear eyewitness accounts, the history behind an article.