
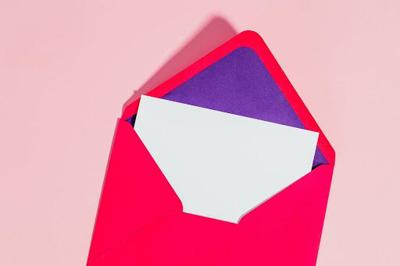
Do you wish to send someone a letter, possibly with a small present or a secret message? A homemade origami letter is an answer!
Sending a letter is romantic; you may call it an old-fashioned style, but it's sweet, and you can see the sender's effort. You can make an origami envelope to add a personal touch to the letter. In addition to being easy to create, this unique design lets you express your creativity. This creative and impressive letter envelope is easy to make at home. These three examples below present perfect ideas. Follow the instructions we provided below to make yours!
What are the things needed to make an envelope?
You can use printed or any colored A4-size paper (you can print anything you like) or not printable, depending on your preference, some scissors, white glue, a marker, and your chosen accessories to add some style. You can even use recycled paper to save more money. It is all up to you and your design.
A Creative Letter Envelope
If you want your letter to be kept safe, make this homemade letter envelope perfect for your love letter. You can use this for any letter you wish to. How to fold an envelope?
Get a square of paper and hold it with the corner facing you. Make sure the colored side is downward if you want a colored envelope.
Along the square, fold the paper in half from corner to corner.
Fold the first layer's top corner to the bottom edge.
Turn the paper's right corner a third to the left.
Fold the left corner to the other end, starting at the top. Now the base should have a square form.
Fold the flap's tip over the other flap and back to the model's left edge.
Fold the flap's tip up to its top corner. Unfold. This crease serves as a guide for the next move.
Crosswise, rotate the paper. Now the angle of the envelope will change.
Open the flap's folded portion.
On this flap, fold it in half. Be careful to flatten it completely; doing so will help keep the envelope closed.
Put it back in the "upright" position.
At the bottom edge, fold the very top tip.
Insert the top flap (the part you just folded down) into the "pocket" the squash fold created.
Now you can draw something on your envelope or use your accessories to beautify it. Make the envelope flat. Please make sure the design can maintain its quality.
A Hidden Message Envelope
Most women love being surprised, and little things made with effort can flatter them. When your girlfriend opens the envelope, they may blush in reaction to the hidden message. How to do it
Take a plain sheet of paper and write your message.
Half it into a hamburger-style fold. The note should appear on the inside.
Fold the paper in half.
Take one side of the paper and, with the words facing you, fold it at a right angle so that the edge meets the first crease. Apply this on the opposite side.
Each right triangle has an empty area on one of its sides. Fold that area with one side such that it touches the right triangle. Apply this on the opposite side.
Next, fold one of the sides at a right angle to the initial crease.
Apply this on the opposite side.
Afterward, choose one of these last triangles. There will be a tiny flap under the tip of it.
Move the point of the triangle under the flap that already exists.
Decorate the envelope to look more creative and lovely.
A Traditional Letter Envelope
Some prefer simple envelopes that are easy to make. Try this one if you don't want to spend a lot of time creating an impressive origami envelope.
Choose a sheet of paper that is exactly twice the size of the needed envelope.
Evenly fold the paper over.
Connect the left and right sides that are open using white glue.
To create a flap, fold the top down.
Put the card or letter inside.
To keep your message sealed, glue the flap.
Any card or letter can have a personal touch by using homemade envelopes. The effort surely is appreciated by the person who will receive it. Not only will you make it with love but also you will be making it with some materials that you can see at home.


(0) comments
We welcome your comments
Log In
Post a comment as Guest
Keep it Clean. Please avoid obscene, vulgar, lewd, racist or sexually-oriented language.
PLEASE TURN OFF YOUR CAPS LOCK.
Don't Threaten. Threats of harming another person will not be tolerated.
Be Truthful. Don't knowingly lie about anyone or anything.
Be Nice. No racism, sexism or any sort of -ism that is degrading to another person.
Be Proactive. Use the 'Report' link on each comment to let us know of abusive posts.
Share with Us. We'd love to hear eyewitness accounts, the history behind an article.