
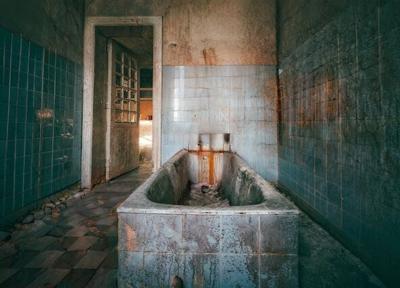

Is your bathroom outdated, lacking functionality, or in need of some serious repairs? It might be time for a renovation! In this comprehensive guide, we'll walk you through the reasons for demolishing your bathroom, the importance of proper planning and execution, and a step-by-step process for safe and efficient demolition. Whether you're considering a DIY approach or hiring professionals, our guide will provide you with valuable insights and tips to help you successfully transform your bathroom into a modern, functional, and appealing space. Let's dive in and start building your dream bathroom oasis!
What are the reasons for demolishing your Bathroom?
There are several reasons for demolishing a bathroom, which often contributes to the overall improvement of a home:
- Outdated design: Aesthetic trends change over time, and an outdated bathroom can impact the overall appeal of a home. Demolishing and renovating the bathroom allows homeowners to update the space with a modern, visually appealing design
- Improving functionality: Over time, homeowners may find that their bathroom no longer meets their needs or preferences. Demolishing the bathroom provides an opportunity to reconfigure the layout, add storage, or install new fixtures that enhance functionality and comfort.
- Repairing damage: Bathrooms are exposed to constant moisture, which can lead to mold, mildew, water damage, or structural issues. Demolishing a bathroom allows homeowners to address these problems, repair any damage, and prevent further complications.
- Increasing home value: A well-designed, updated bathroom can significantly increase a home's value, making it a worthwhile investment for homeowners looking to sell their property in the future.
The Importance of Proper Planning and Execution in Bathroom Demolition
Proper planning and execution are crucial when demolishing a bathroom for renovation. A well-thought-out plan can make the process smoother, more efficient, and ultimately lead to a successful outcome. Here are several reasons why proper planning and execution are essential:
Safety
Demolishing a bathroom involves dealing with electrical wiring, plumbing, and potentially hazardous materials. Proper planning ensures that all safety precautions are taken, such as turning off utilities and wearing appropriate protective gear, reducing the risk of accidents and injuries during the process, and more! When it comes to demolition projects, hiring professionals like Bella Contracting Services in Cleveland ensures the highest standards of safety and efficiency. Explore more about their expertise in demolition Cleveland.
Cost efficiency
A well-planned demolition can help avoid costly mistakes, such as damaging essential plumbing or electrical systems. Accurate cost estimates for labor, materials, and waste disposal can also help homeowners stay within their budget. Working with experienced contractors can further enhance cost management, as they bring expertise and efficient work practices to the table. Seasoned professionals in home renovations can anticipate potential issues and streamline the process, ensuring that the project remains on schedule and within financial constraints. They will also give you detailed quotes for the project, making it easier to stay on budget.
Time management
A well-organized demolition process minimizes delays and allows homeowners to complete the renovation more quickly. Creating a timeline for each phase of the project can help ensure that all tasks are completed efficiently and on schedule.
Minimizing environmental impact
Proper planning and execution help minimize the environmental impact of a bathroom demolition. By identifying recyclable materials and disposing of waste responsibly, homeowners can reduce the amount of waste sent to landfills and contribute to a more sustainable renovation.
Smooth transition to renovation
A well-executed demolition sets the stage for a successful renovation. By thoroughly inspecting and preparing the space for the next phase, homeowners can avoid surprises and ensure a smoother transition to the renovation process.
If you consider DIY, you should know that by hiring professional demolition contractors, you can benefit from their expertise in handling various types of materials and demolition techniques. These professionals are well-versed in local regulations and safety procedures, helping to minimize risks and ensure a successful outcome for your renovation project.
Additionally, hiring an experienced demolition crew can save time and effort for homeowners.
Still want to DIY? Here’s How:
Before starting the bathroom demolition process, it's essential to prioritize safety and ensure that you've taken the necessary precautions.
Here are some important steps to follow:
Gather necessary safety equipment
When demolishing a bathroom, it's important to protect yourself from potential hazards such as sharp objects, flying debris, and dust.
Be sure to gather the following safety equipment before starting:
- Heavy-duty gloves to protect your hands from cuts and abrasions
- Safety goggles to shield your eyes from dust and debris
- A dust mask or respirator to prevent the inhalation of dust particles and harmful substances
- Sturdy, closed-toe shoes to protect your feet from injury
- Ear protection, such as earplugs or earmuffs, to minimize noise exposure
Turn off utilities
Before beginning the demolition, it's crucial to turn off all utilities connected to the bathroom:
- Water: Locate the main water shutoff valve for the house and turn it off to prevent water damage and potential flooding.
- Electricity: Shut off the power to the bathroom by switching off the corresponding circuit breaker in your home's electrical panel. This helps avoid electrocution hazards while working with electrical wiring and fixtures.
- Gas: If your bathroom has any gas appliances, such as a gas water heater, make sure to turn off the gas supply at the main shutoff valve.
Protect surrounding areas:
To minimize damage to adjacent areas and make cleanup easier, take the following precautions:
- Lay down drop cloths or tarps in the hallway leading to the bathroom and any adjacent rooms to catch debris and protect flooring.
- Use plastic sheeting to seal off the bathroom doorway, preventing dust and debris from spreading throughout the house.
- Remove any valuable or fragile items from the vicinity of the bathroom to prevent damage.
How to Redo an Entire Bathroom | DIY Demolition
Removing Fixtures and Accessories
Remove light fixtures and electrical outlets:
Before starting the demolition, carefully remove all light fixtures, switches, and electrical outlets. Be sure the power is turned off, as mentioned earlier. Unscrew and disconnect the wiring from these fixtures, labeling the wires for future reference if needed.
Disconnect and remove plumbing fixtures:
After turning off the water supply, disconnect and remove all plumbing fixtures in the bathroom, including the sink, toilet, bathtub, and shower. Be prepared for some water to drain from the pipes when disconnecting them. You may need pipe wrenches, a basin wrench, and a plumber's snake to help with this process.
Carefully remove cabinets and vanities:
Start by removing any drawers, shelves, and doors from the cabinets and vanities. Then, use a pry bar, hammer, or screwdriver to carefully detach the cabinets and vanities from the walls and floor. Be cautious not to damage the walls or flooring beneath the fixtures.
Demolishing Walls and Flooring
Determine which walls are load-bearing and plan accordingly
Before beginning wall demolition, identify which walls are load-bearing by consulting your home's blueprints or a structural engineer. Load-bearing walls cannot be removed without proper support, as they provide structural integrity to the building.
Break down non-load-bearing walls:
Once you've determined which walls are non-load-bearing, use a sledgehammer, pry bar, or reciprocating saw to break them down. Start at the top and work your way down, being careful to avoid damaging any electrical or plumbing systems within the walls.
Remove drywall or tiles from walls:
To remove drywall, use a pry bar or hammer to create a hole in the center of the wall and then carefully pull away the drywall from the studs. For tile removal, use a hammer and chisel to break the tiles and then pry them off the wall. Be cautious of sharp edges and flying debris.
Remove flooring materials:
Depending on the type of flooring in your bathroom, different tools and techniques may be required for removal. For tiles, use a hammer and chisel or a floor scraper to break and remove them. For linoleum or vinyl flooring, use a utility knife to cut the material into strips and then pull it up from the subfloor. Dispose of the removed materials responsibly.
A Successful Bathroom Demolition
Demolishing a bathroom for renovation is a multi-step process that requires careful planning and execution. By following the main steps outlined in this guide, you can ensure a safe and efficient demolition.
(0) comments
We welcome your comments
Log In
Post a comment as Guest
Keep it Clean. Please avoid obscene, vulgar, lewd, racist or sexually-oriented language.
PLEASE TURN OFF YOUR CAPS LOCK.
Don't Threaten. Threats of harming another person will not be tolerated.
Be Truthful. Don't knowingly lie about anyone or anything.
Be Nice. No racism, sexism or any sort of -ism that is degrading to another person.
Be Proactive. Use the 'Report' link on each comment to let us know of abusive posts.
Share with Us. We'd love to hear eyewitness accounts, the history behind an article.