
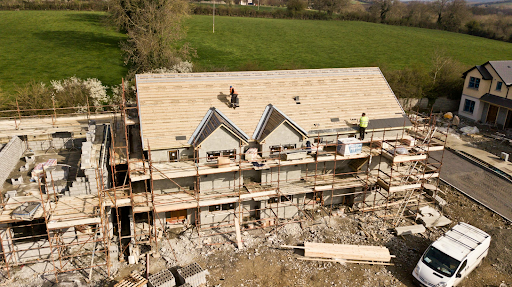
Maintaining a sturdy roof is crucial for protecting your home from the elements. When you notice signs of damage such as leaks or missing shingles, addressing them promptly can prevent further issues down the road. Instead of immediately calling in a professional, you can take matters into your own hands with the right tools and knowledge. Here are practical steps to fix your roof efficiently and effectively. Whether you're dealing with minor repairs or preparing for a new season, these smart steps will help you keep your roof in top condition without breaking the bank.
Seek a Professional Help
If you encounter extensive damage, multiple leaks, or structural issues during your roof inspection, it's crucial to seek professional help. A licensed roofing contractor has the expertise and equipment to handle complex repairs safely and effectively. They can also provide valuable advice on maintaining your roof's integrity and preventing future problems. For regular inspection, roofing in Taylorsville can help identify potential issues early and prevent costly repairs down the road. Don't hesitate to contact a professional if you're unsure about the extent of damage or if the repairs seem beyond your DIY capabilities.
Gather the Right Tools and Materials
Gathering the right tools and materials is crucial for successfully repairing your roof. Start by ensuring you have roofing nails, shingles that match your existing roof, a hammer, roofing cement, a pry bar for removing damaged shingles, and a sturdy ladder. Having these items ready before you begin will streamline the repair process and minimize the chances of interruptions or delays. Additionally, consider safety gear such as non-slip shoes and, if necessary, a harness for working on steep roofs.
Roofing Nails: Opt for galvanized roofing nails that are resistant to rust and corrosion. Choose the appropriate length to securely fasten your shingles without damaging them.
Shingles: Match the new shingles with the existing ones in color and style to maintain the aesthetic appeal of your roof. Ensure they are of high quality to withstand weather conditions and last longer. Consider using certainteed roofing shingles for a reliable option that blends seamlessly with various architectural designs. Their durability and range of styles make them an excellent choice for homeowners looking to protect and enhance their roof's appearance.
Hammer and Pry Bar: Use a claw hammer to remove old nails and a pry bar to lift damaged shingles without causing further harm to surrounding materials. These tools provide the leverage needed for precise repairs.
Roofing Cement: Invest in a good quality roofing cement that adheres well to different roofing materials. It acts as a sealant to prevent water penetration around edges and joints, enhancing the longevity of your repair.
Ensure Safety First
Ensure your safety is a priority before beginning any roof repair project. Use a sturdy ladder placed on stable ground, wear non-slip shoes, and consider using a safety harness if your roof has a steep pitch. Clear the area of debris and ensure you have a spotter if needed. Taking these precautions will minimize the risk of accidents and injuries, allowing you to focus on completing the repair effectively.
Remove Damaged Shingles
To remove damaged shingles, start by using a pry bar to carefully lift the edges of the surrounding shingles. Next, locate and remove the nails holding the damaged shingle in place, ensuring not to damage the surrounding shingles in the process. Once the nails are out, gently lift and remove the damaged shingle, taking care not to disturb adjacent roofing materials. Clear any debris or old roofing cement from the area to prepare it for installing the new shingle securely.
Inspect the Area Thoroughly: Begin by carefully examining the damaged shingles. Look for signs of curling, cracking, or missing pieces, as these indicate areas needing immediate attention. Take note of any underlying issues, such as water damage or rot, which may require additional repairs.
Use a Pry Bar with Caution: When removing damaged shingles, use a pry bar to gently lift the edges of the shingle above. Avoid applying excessive force to prevent damaging surrounding shingles or the roof deck. Work slowly and methodically to loosen the nails securing the damaged shingle in place.
Dispose of Old Shingles Properly: Once the damaged shingles are removed, dispose of them responsibly. Place them in a designated waste container to avoid creating a hazard or littering your yard. Clearing away old materials ensures a clean work area and reduces the risk of accidents during the repair process.
Inspect Underlying Layers: After removing the shingles, inspect the underlying layers of the roof. Check for any signs of water penetration, such as wet or soft spots, which could indicate a more extensive problem. Addressing underlying issues promptly helps prevent future damage and ensures your roof remains in good condition.
Install New Shingles
To install new shingles, place the replacement shingle carefully into the gap left by the removed damaged shingle. Ensure it aligns properly with the adjacent shingles to maintain a uniform appearance. Use roofing nails to secure the new shingle in place, typically placing them just below the adhesive strip. Apply roofing cement under the edges of the surrounding shingles to provide extra security against leaks and wind uplift. Smooth down the edges of the new shingle to ensure a tight fit and effective seal, helping to protect your roof from further damage.
Prepare the Roof Surface: Before installing new shingles, ensure the roof surface is clean and free of debris. Use a broom to sweep away dirt, leaves, and any loose materials. This ensures the new shingles adhere properly and lay flat, preventing premature wear.
Apply Underlayment: Lay down the roofing felt or underlayment over the roof deck before installing the new shingles. This provides an additional layer of protection against water infiltration and helps to improve the overall durability of your roof. Secure the underlayment with staples or nails, ensuring it overlaps correctly according to manufacturer guidelines.
Start at the Bottom: Begin installing shingles at the bottom edge of the roof, overlapping each row as you work your way up. Use roofing nails to secure each shingle, positioning them according to the manufacturer's instructions for proper alignment and spacing. Ensure each row overlaps the one below it to create a water-tight seal.
Check for Leaks
After replacing the damaged shingles, it's crucial to check for leaks to ensure your repair is effective. Use a hose to gently spray water over the repaired area and observe closely for any signs of moisture inside your home. Pay special attention to ceilings and walls directly beneath the repaired section. If you notice any leaks, apply additional roofing cement or consider consulting a professional to address the issue promptly. This step ensures that your roof remains watertight and protects your home from potential water damage.

By following these steps, you can fix your roof easily and efficiently. Regular maintenance and prompt repairs will extend the life of your roof and save you money in the long run. Don't hesitate to tackle small repairs yourself - your roof (and wallet) will thank you.

(0) comments
We welcome your comments
Log In
Post a comment as Guest
Keep it Clean. Please avoid obscene, vulgar, lewd, racist or sexually-oriented language.
PLEASE TURN OFF YOUR CAPS LOCK.
Don't Threaten. Threats of harming another person will not be tolerated.
Be Truthful. Don't knowingly lie about anyone or anything.
Be Nice. No racism, sexism or any sort of -ism that is degrading to another person.
Be Proactive. Use the 'Report' link on each comment to let us know of abusive posts.
Share with Us. We'd love to hear eyewitness accounts, the history behind an article.