
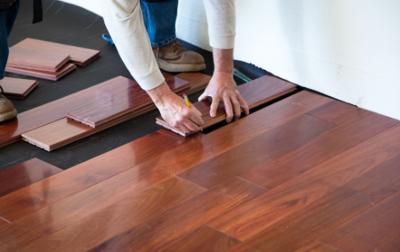

Engineered wood flooring can be laid over concrete by bonding it to the prepared base or floating it over suitable underlay. The right method depends on the boards and the condition of the slab. Before buying adhesive or booking a fitting date, establish how moisture, surface preparation and the finished floor height will be handled.
Match the boards to the installation
Start with the current instructions for the exact flooring product. Manufacturer documents such as V4’s installation guidance cover room conditions, subfloor requirements and fitting methods. Use the requirements for your chosen boards to select preparation materials, moisture protection, adhesive or underlay.
The installation brief should cover assessment, preparation and fitting as one connected job. For a service such as Engineered wood flooring newcastle, record the chosen product, approved method and preparation included before agreeing the start date.
Establish whether the concrete is ready
A dry-looking surface gives only part of the picture. Assess concrete moisture using an appropriate test, record the method and compare the result with the proposed system’s acceptance criteria. Concrete relative humidity readings and moisture-content percentages are different measurements and must be interpreted accordingly. Include new slabs in these checks: age alone is an unreliable guide to readiness.
Inspect the surface for contamination, loose material, humps and hollows. It needs to be sound, suitably clean and within the required flatness tolerance. Flatness concerns local irregularities; levelness concerns the slope of the floor. Check the base using the assessment method specified for the installation.
Investigate unexplained cracks, crumbling areas and unresolved moisture before covering them. Removing contamination and correcting irregularities may form part of the preparation, but repairs and moisture-control treatments need to address the actual condition of the base. Filling cracks or applying a membrane is not an automatic solution.
Understand floating and bonded installation
In a floating installation, the boards form a connected floor without being bonded to the concrete. They sit over an approved underlay, with moisture protection appropriate to that assembly. Check separately whether the underlay provides the required protection. Extra cushioning is no substitute for a flat, sound base.
With a fully bonded installation, flooring adhesive secures the boards to the prepared substrate. The adhesive and any primer, moisture-control treatment or smoothing compound must work together as a compatible system. Both methods depend on proper surface preparation.
Click and tongue-and-groove describe how boards join; floating and bonded describe how the floor is installed. A click joint identifies the joining mechanism, so check the approved fitting method separately.
Prepare and lay in the right order
Complete wet work and establish the required indoor conditions before fitting. Store and acclimatise the boards according to their instructions, which determine the conditions and time needed. Inspect each board for defects before laying it, while it can still be set aside.
Carry out the specified concrete preparation, allowing each product to dry or cure before the next stage. Check the combined floor height at doors and adjoining surfaces, including every layer beneath the boards. Resolve clearance and threshold details before laying begins.
For a floating floor, install the specified moisture protection and underlay, then assemble the boards using the correct jointing procedure. Maintain the required expansion allowances around the perimeter and fixed obstructions.
For a bonded floor, set out the starting row before applying adhesive. Use the specified trowel and spread only an area that can be covered correctly within the adhesive’s stated working time. Position and join the boards using the approved procedure.
Check alignment and joints as fitting progresses, following the product’s requirements for joint offsets and perimeter cuts.
Finish before bringing the room back into use
Allow for any adhesive curing and access restrictions before walking across the floor or returning furniture.
Check doors, thresholds and finishing trims, ensuring that the required movement allowances remain effective. Finish a floating floor without trapping it beneath trims or fixtures contrary to its instructions.
Keep the product instructions, moisture assessment and preparation details together. That record explains what was installed, how the base was prepared and why the concrete was accepted for fitting, providing a useful reference beyond the completion date.

(0) comments
We welcome your comments
Log In
Post a comment as Guest
Keep it Clean. Please avoid obscene, vulgar, lewd, racist or sexually-oriented language.
PLEASE TURN OFF YOUR CAPS LOCK.
Don't Threaten. Threats of harming another person will not be tolerated.
Be Truthful. Don't knowingly lie about anyone or anything.
Be Nice. No racism, sexism or any sort of -ism that is degrading to another person.
Be Proactive. Use the 'Report' link on each comment to let us know of abusive posts.
Share with Us. We'd love to hear eyewitness accounts, the history behind an article.